This question for some people is something from the realm of unreality. There is no technical connection with the terminal in AinurPOS, but it is possible to establish a connection in order to make non-cash payments. We’ll tell you how.
Step 1. Create an account.
Web version
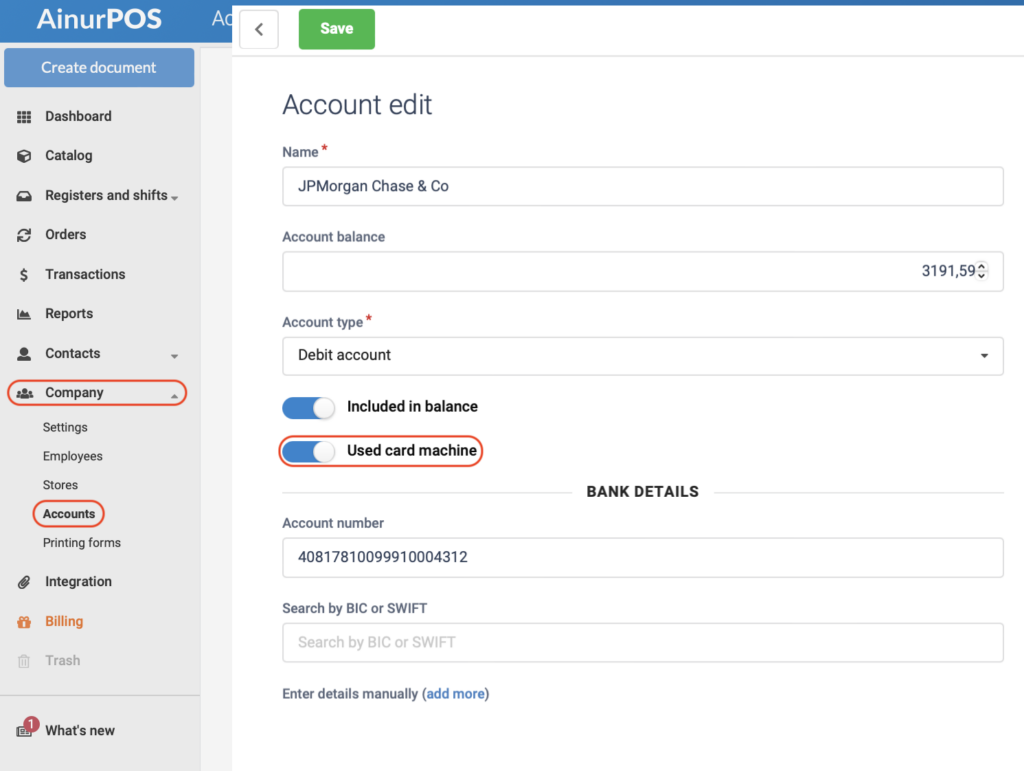
If you work in the web version of AinurPOS, then in the “Company” menu, in the “Accounts” section, create an account. In this case, you must select the type “Debit account” and be sure to enable “Used Card Machine”.
Android App
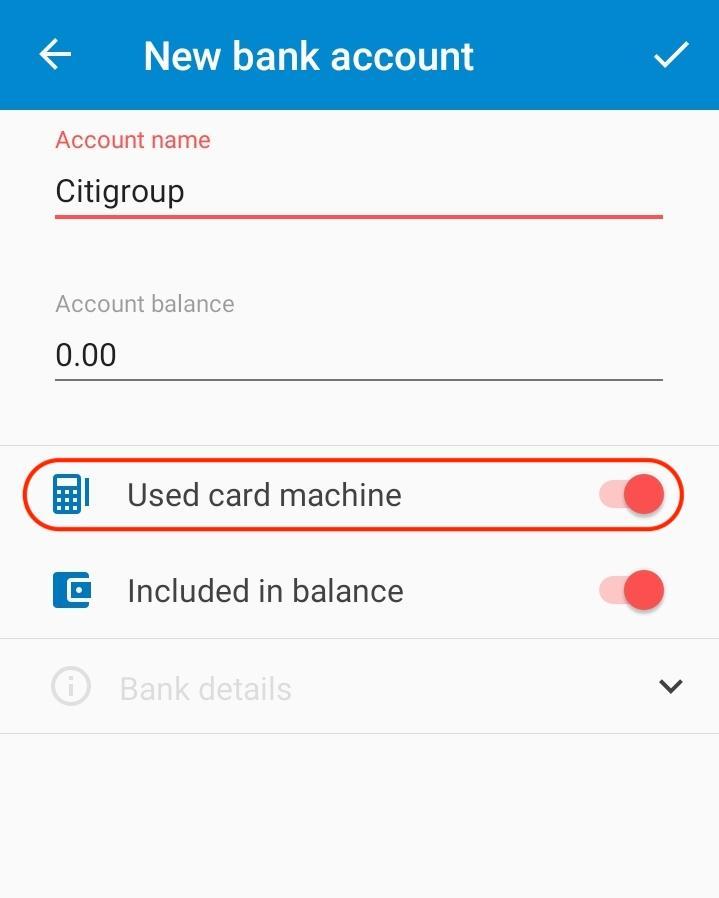
If you work in the application, then you need to go to “Accounts”, and click the plus sign. Next – give a name to the account, and turn on the “Used Card Machine”.

Step 2. Attach the terminal to the Register.
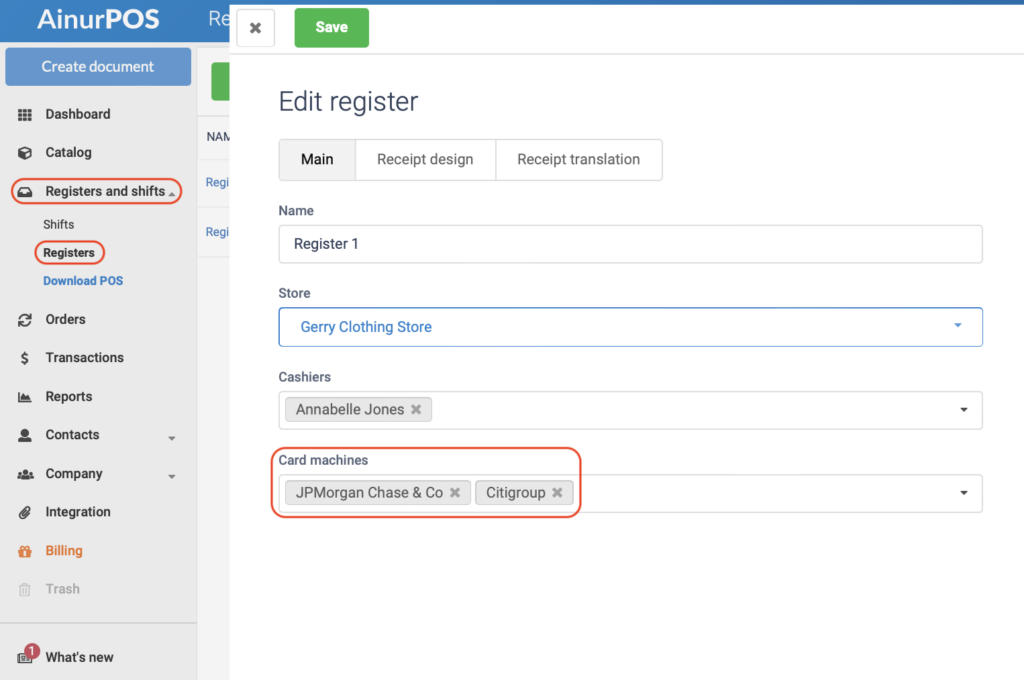
1. Go to the “Registers and Shifts” section.
2. Open cash register editing.
3. Specify the terminal and save the cash register.
Web version
Android App

Step 3. Make a payment.
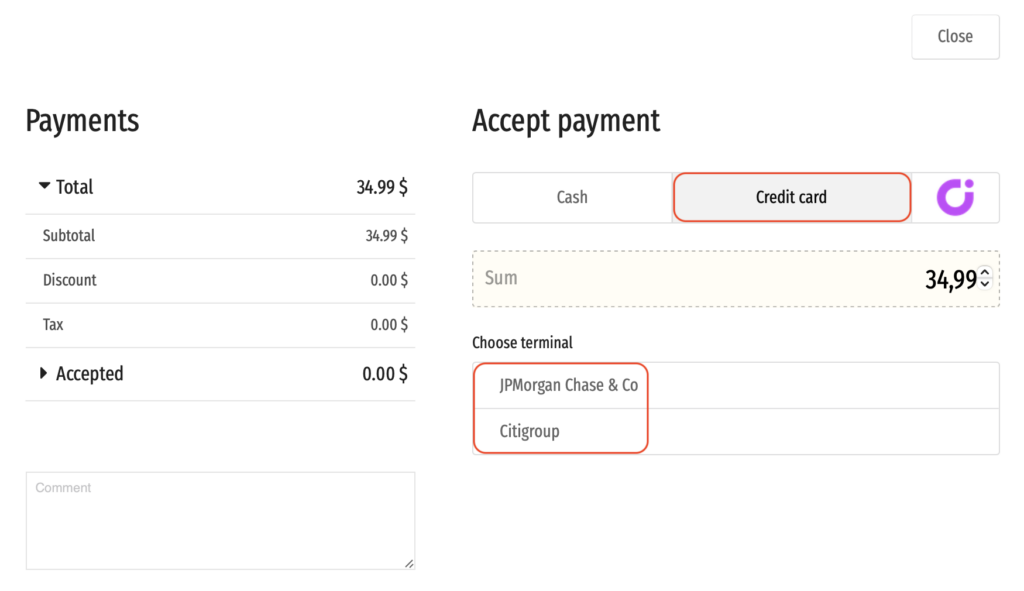
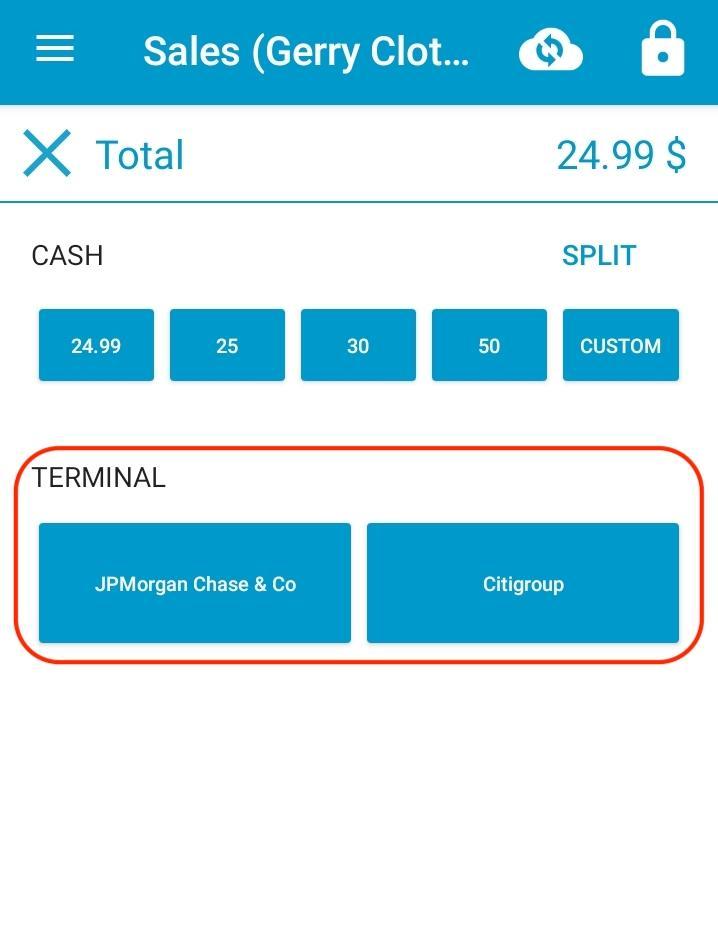
In the Point of Sale, when making a payment, the program will automatically display your bank accounts that use the terminal. Choose the one you need, and if the payment went through, click “Successful”. Similarly, everything is done in the AinurPOS cash register application.
Web POS / Windows Desktop POS
If you have attached only one terminal to the checkout, then the cashier just needs to select payment by “Credit Card” and press the blue “Accept” button. If several terminals are attached to the checkout, then you need to choose which terminal to pay for.
Android– Point of Sale
Similarly, terminals are displayed in Android: POS
Now your cashier will be able to accept card payments in the store.
Important! If the cashier made a payment by mistake in the wrong way (for example, the client paid in cash, but the cashier accepted by card), you cannot simply edit the sale in the main applications. There will be a discrepancy between the cash counter in the cash register application and on the server. Therefore, in such a situation, you need to make a return and arrange the sale again.
