We have already been taught how to work with goods, now it’s time to start selling at the cash register.
Creating a cash register
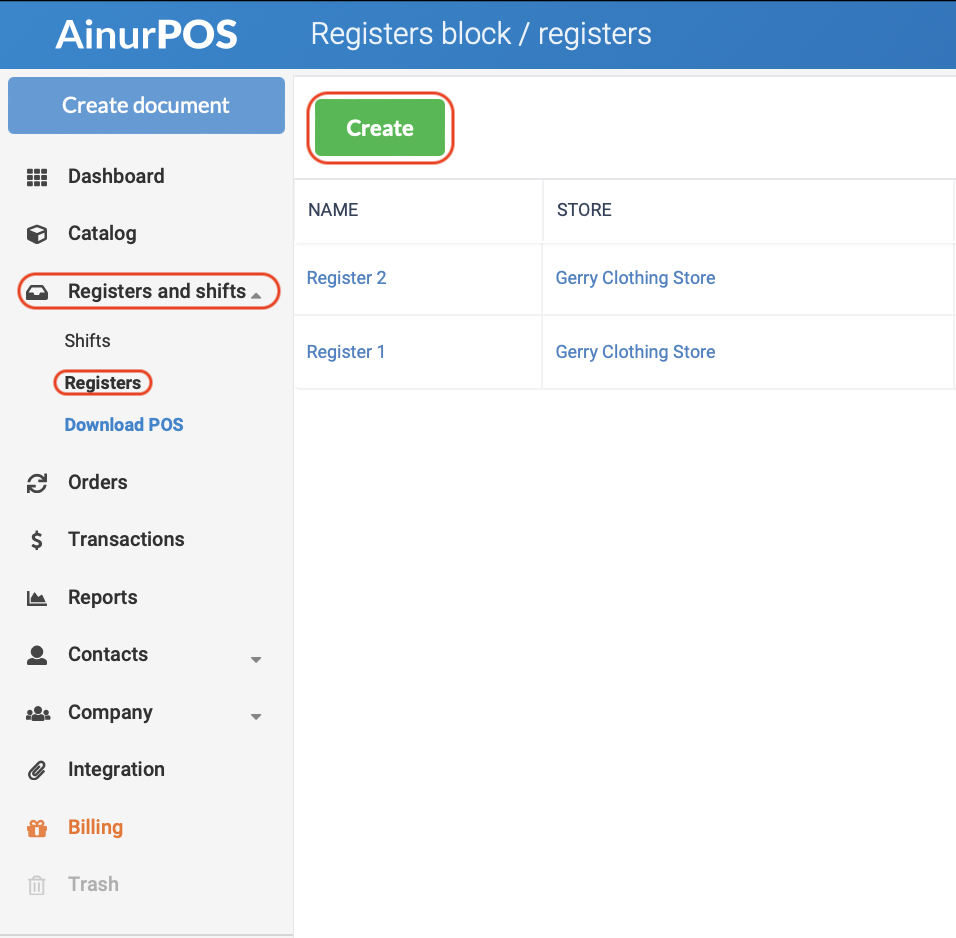
Go to the registers and shifts > registers section and press the “Create” button.

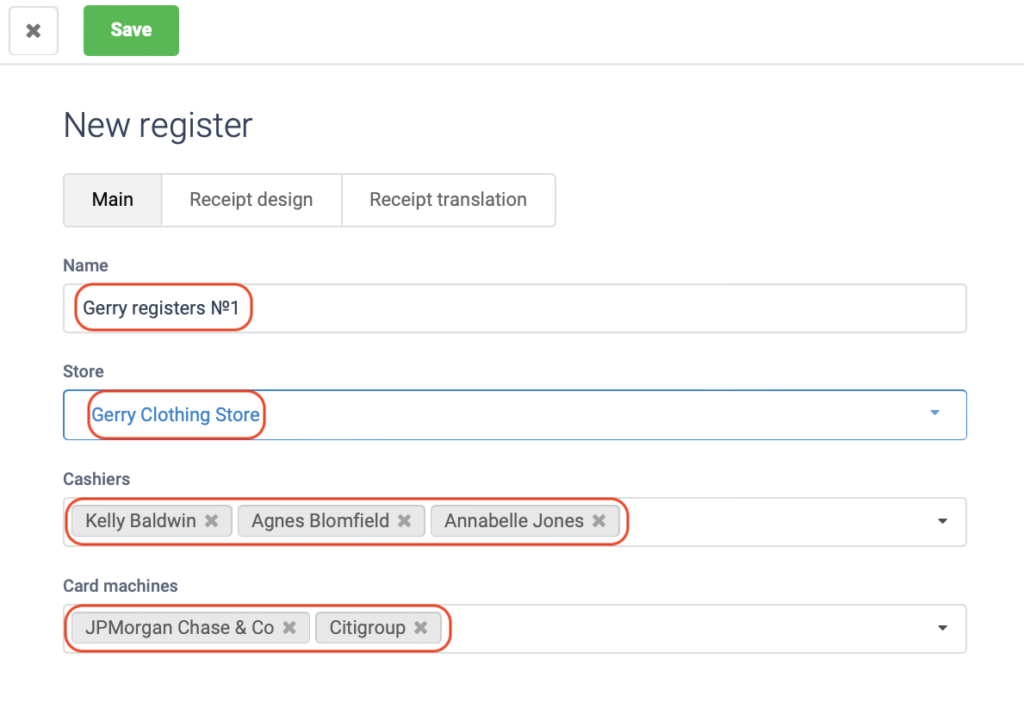
Here you need to set a name for the register so that it is clear which register you are talking about.
Store. This is an important point, it binds the added register to the store where sales are taking place. The cash register will display the balances of this particular store.
If for some reason you have deleted the store to which the checkout was linked, checkout applications will not work correctly.
Cashiers. Here you need to select those employees who can work at the register.
Only employees with the role of Cashier or Owner can work at the registers. Make sure the cashier is linked to the store, i.e. can create any documents in it.
Card Machines. Select all accounts that can accept non-cash payments at the register. More details in a special article.

Press the “save” button.
The registers section displays a list of registers and all the main information for each register.
POS applications
Now it’s time to choose in which application the cashier will work in the store. There are several options.
- If you do not need to connect additional equipment, but only record sales, then you can use the web version of the cash register application. It is launched by the “Point of Sale” button in the main web version.
- If you plan to connect a special receipt printer or an online cash register, you need to download a special Windows desktop Point of sale application.
- You can always make sales from a smartphone or tablet running Android OS.
- Our POS Android app is also available for SUNMI POS devices
Start
Now the cashier can sign in to the cash register application, start the shift and start selling.
