You can create a new product in all major AinurPOS applications.
To create a new product in the web version, you must click the “Create Product” button on the Goods and Services screen.
In the window that opens, you must select the type of product. It can be a product, service, or set. A separate article is devoted to working with sets, here we will consider the creation of goods and services.
A product differs from a service only in that the product has a physical balance in the store and each goods movement document changes this balance, but the service as such does not have a balance.

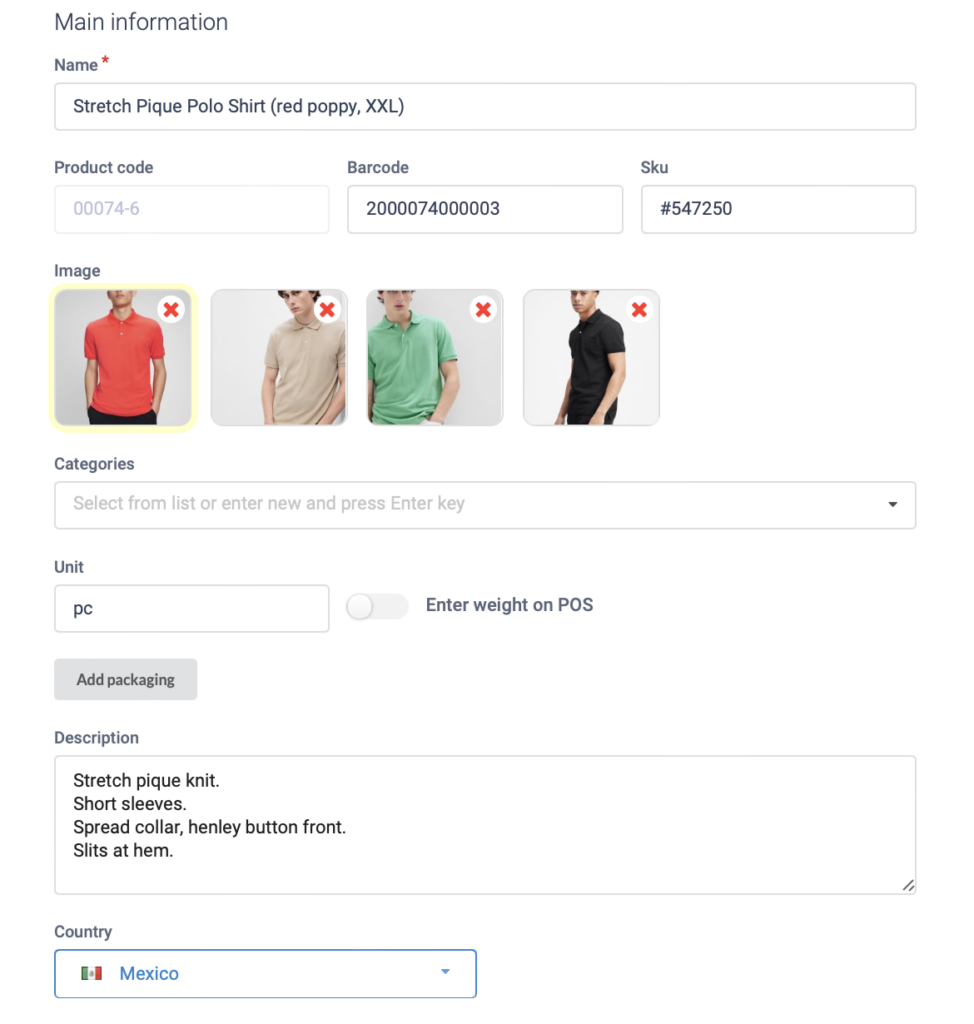
After choosing the type of goods, you must fill in the only required field – Name.
Barcode. Internal code that is automatically generated by the system. Based on this code, a barcode can be generated.
Sku. The field for entering an additional product code.
Image. You can upload up to 4 product images.
Categories. Here you need to enter or select the desired categories – tags for the new product. You can learn about working with categories in a separate article.
Unit. A free field in which you can specify the displayed unit of measure.
Switch “Enter weight on POS“. By default, when selling goods at the checkout, one unit of goods is automatically added to the receipt. But if you enable a “Enter weight on POS“, then the cashier will be prompted to enter the quantity of the product. You can read more about working with weighted goods here.
Set. AinurPOS implements the possibility of purchasing goods in packages. Here you can specify the quantity of goods in packages. You can learn more about packaging work here.
Description. The product description field is required for the storefront to work.
Country. Select the country of origin of the product from the list.
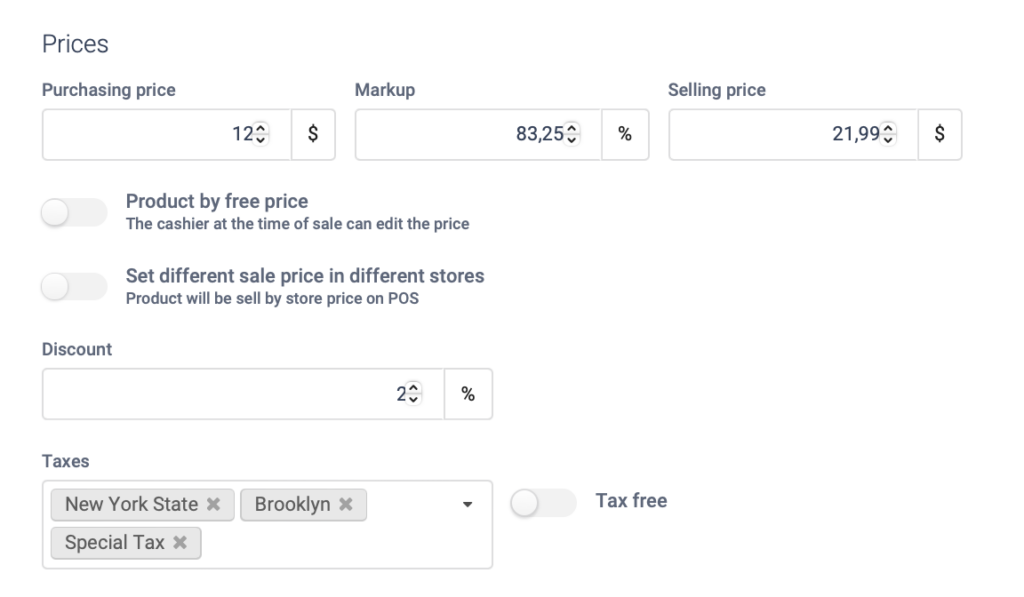
Purchase price. The base price at which the item will be purchased.
Markup. Here you can specify the % markup, which will be added to the purchase price.
Selling price. Here you enter the base selling price. If a purchase price – markup pair is entered, then the sale price will be calculated automatically.
Product at a free price. By default, the cashier cannot change the sale price when selling. This switch allows the cashier to enter their sales price at the checkout.
Different sale prices in different stores. AinurPOS has the ability to specify different selling prices in different stores. Read more about prices here.
Discount. Here you can specify the discount percentage for the position being created. More about discounts.
Taxes. In this block, the tax that is levied on the sale of a new product is selected. An article about setting taxes.
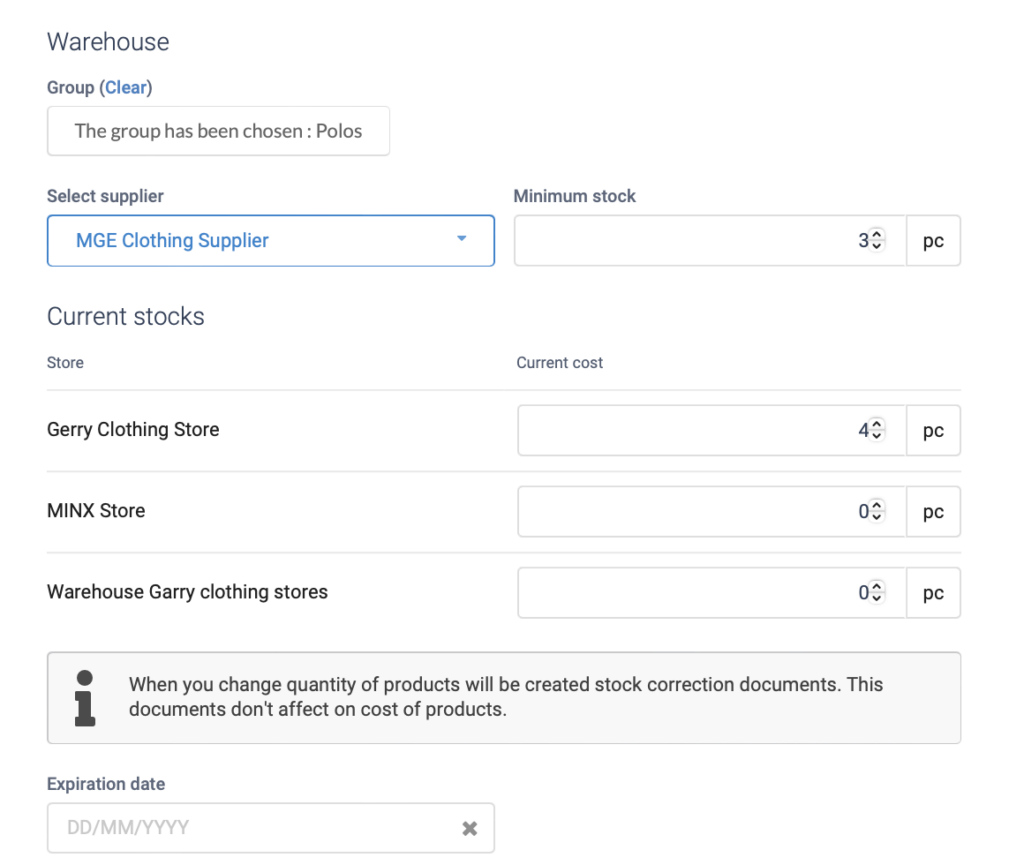
Warehouse
Group. Here you select which group the product should be in. If before creating a new product you were already inside a group, then it will be automatically substituted. More about groups.
Supplier. Select a supplier from the list of partners.
Minimum stock. Specify what should be the minimum balance and AinurPOS will inform you if the goods have become less.
Product with modifications. If the product has variations, such as size or color, then you can create them here. Learn more about working with modifications.
Enter initial stock. AinurPOS allows you to immediately indicate your initial balances when adding a new product so that you can immediately start selling. By specifying the initial balance in each store, after saving the goods, the necessary posting documents will be created. Important! In order for the cost price to be calculated correctly, it is necessary that the purchase price be indicated for a new product with initial balances.
Expiration date. Here you need to indicate the nearest time when the consignment of goods is overdue and must be withdrawn from sale. You can learn more about working with expiration dates here.